How to Use Ripple
Ripple is an insight engine that allows you to query your information across all Workspaces, Spaces, Folders, and Files. #RippleIt
Navigate to the Ripple page by selecting the Ripple list item located in the left sidebar menu under Workspaces
Naming and Filtering
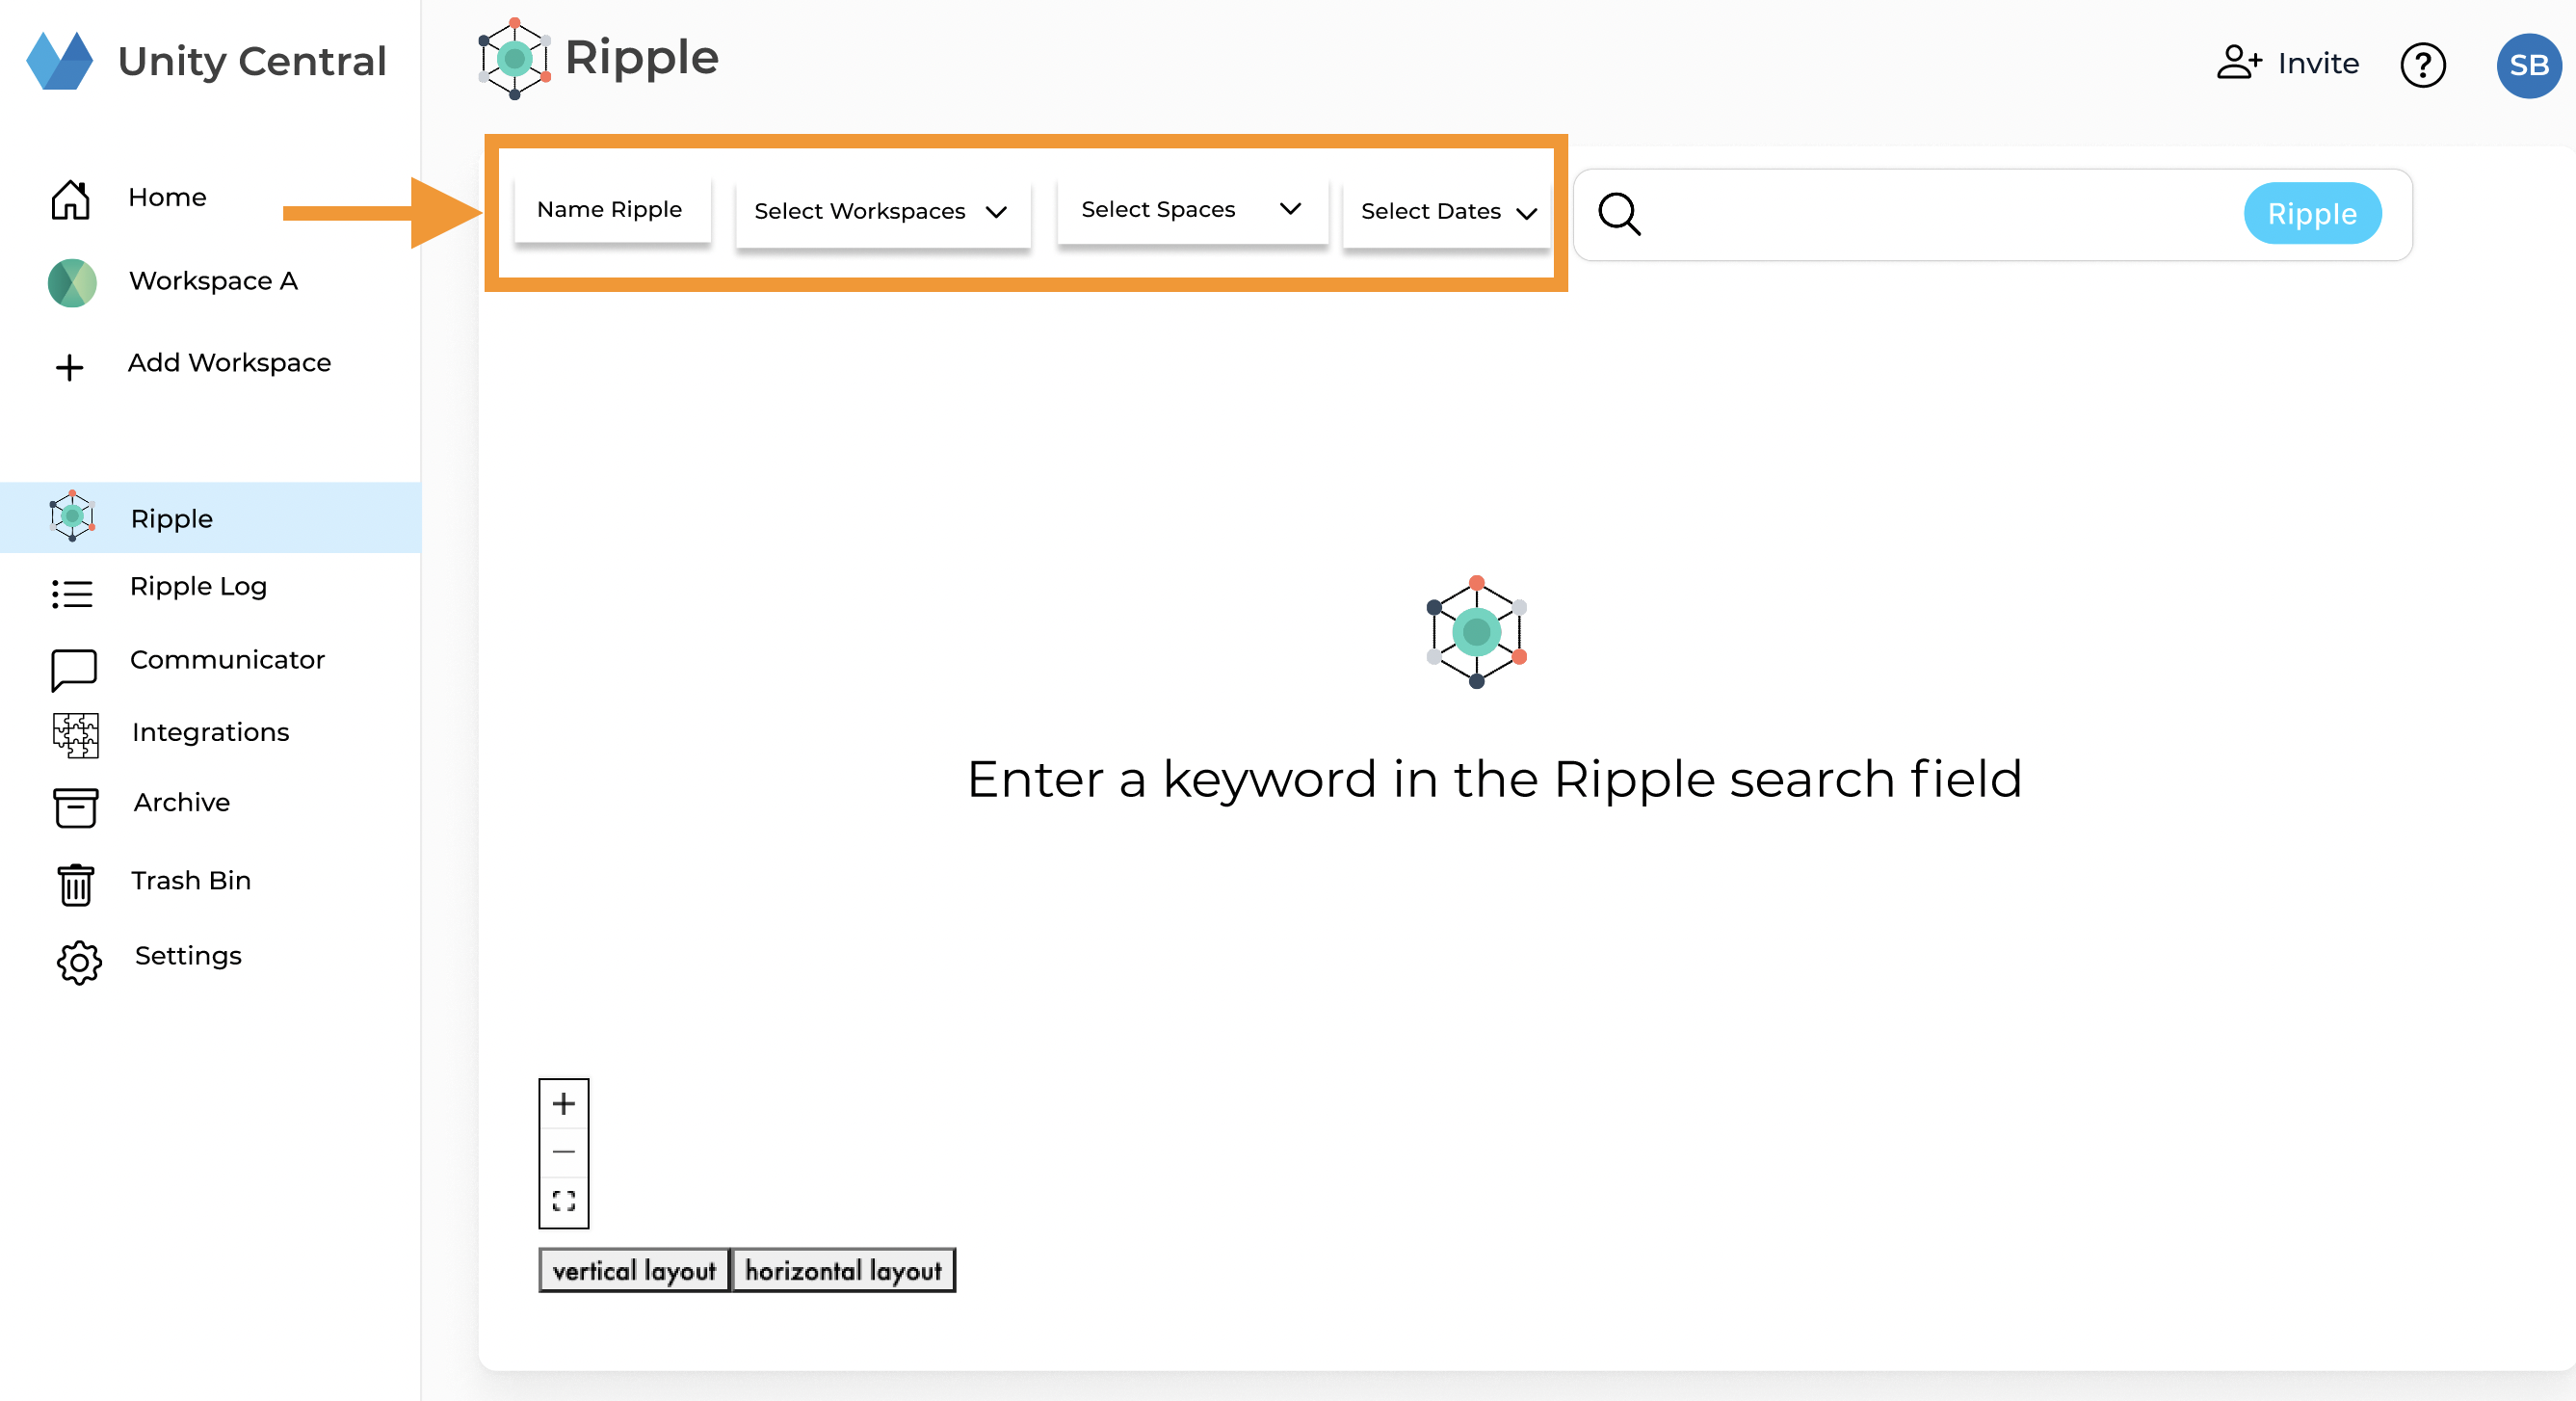
From the top left of the Ripple page, you have the option to name and filter your query results before entering your search terms.
Steps:
- Name Ripple
- Select Workspace/s
- Select Space/s
- Select data range
Note: The system will automatically search across all your Workspaces and auto-generate a name if you decide not to name or filter your Ripple search before running the query.
Ripple Search Terms Steps:
- Enter the first search term in the input field
- Press ENTER on you keyboard to add the search term as a chip (see below)
- Repeat the process for additional search terms
- Click the blue Ripple button to the right of the search terms


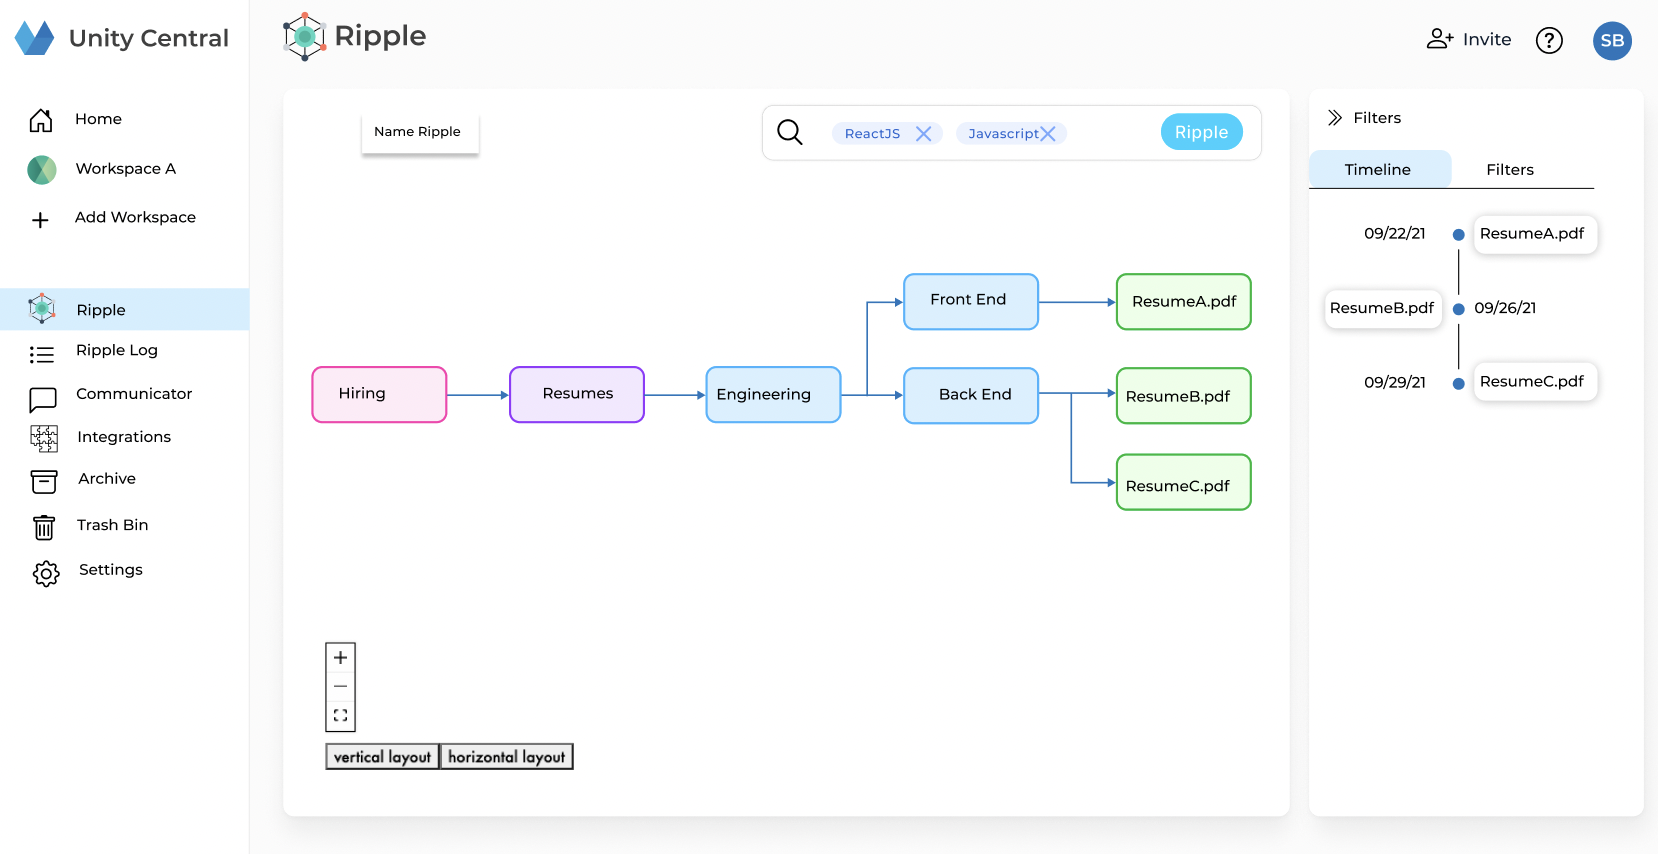
After selecting the Ripple button, your results will display below and a Timeline will display to the right of the results (see screenshot below)
Each node color in the Ripple results displays the hierarchy where your search terms exist. The pink nodes represent Workspaces, purple nodes Spaces, blue nodes Folders, and green nodes Files.
As shown in the Ripple result below, the search terms "React JS" and "JavaScript" resulted in those words being present in three files "ResumeA.pdf", "ResumeB.pdf" and "ResumeC.pdf". The files are located within "Front End", "Back End", and "Engineering" Folders, "Resumes" Space, and "Hiring" Workspace.
To open the files, double-click the white nodes in the right panel Timeline. The Timeline displays when the files were added to the system.