How to Use Flow
Flow is a feature within Unity Central that enables you to track, analyze, and gain visibility into documents as they move through a process.
Before getting started, make sure you create Workspace / Space / Folders hierachy organized for your process. This is where your documents will be saved when you upload them to the system. Click here to learn more about how to create a Workspace / Space / Folder hierarchy.
Getting Started
First, navigate to the Flow page by clicking on the Flow icon located in the left sidebar menu.

Once selected, you will be taken to the "Dashboard” page. There are five tabs that can be selected at the top of the page: Dashboard, Library, Settings, Report, and Compare.
“Dashboard” displays all the reporting information you need to analyze and track documents flowing within your Flow.
“Library” enables you to create, view, and edit Flows. You will need to first create a Flow to display analytics within the Dashboard.
"Settings" provides a place to configure dashboard reports and configure email notifications
"Report" is a view summary of data from each flow such as instances and alerts.
"Compare" allows you to see a side-by-side data comparison from two sets of flows
We will explain the Dashboard functionality in more depth later in this tutorial after we explain how to create a Flow.
Creating a Flow
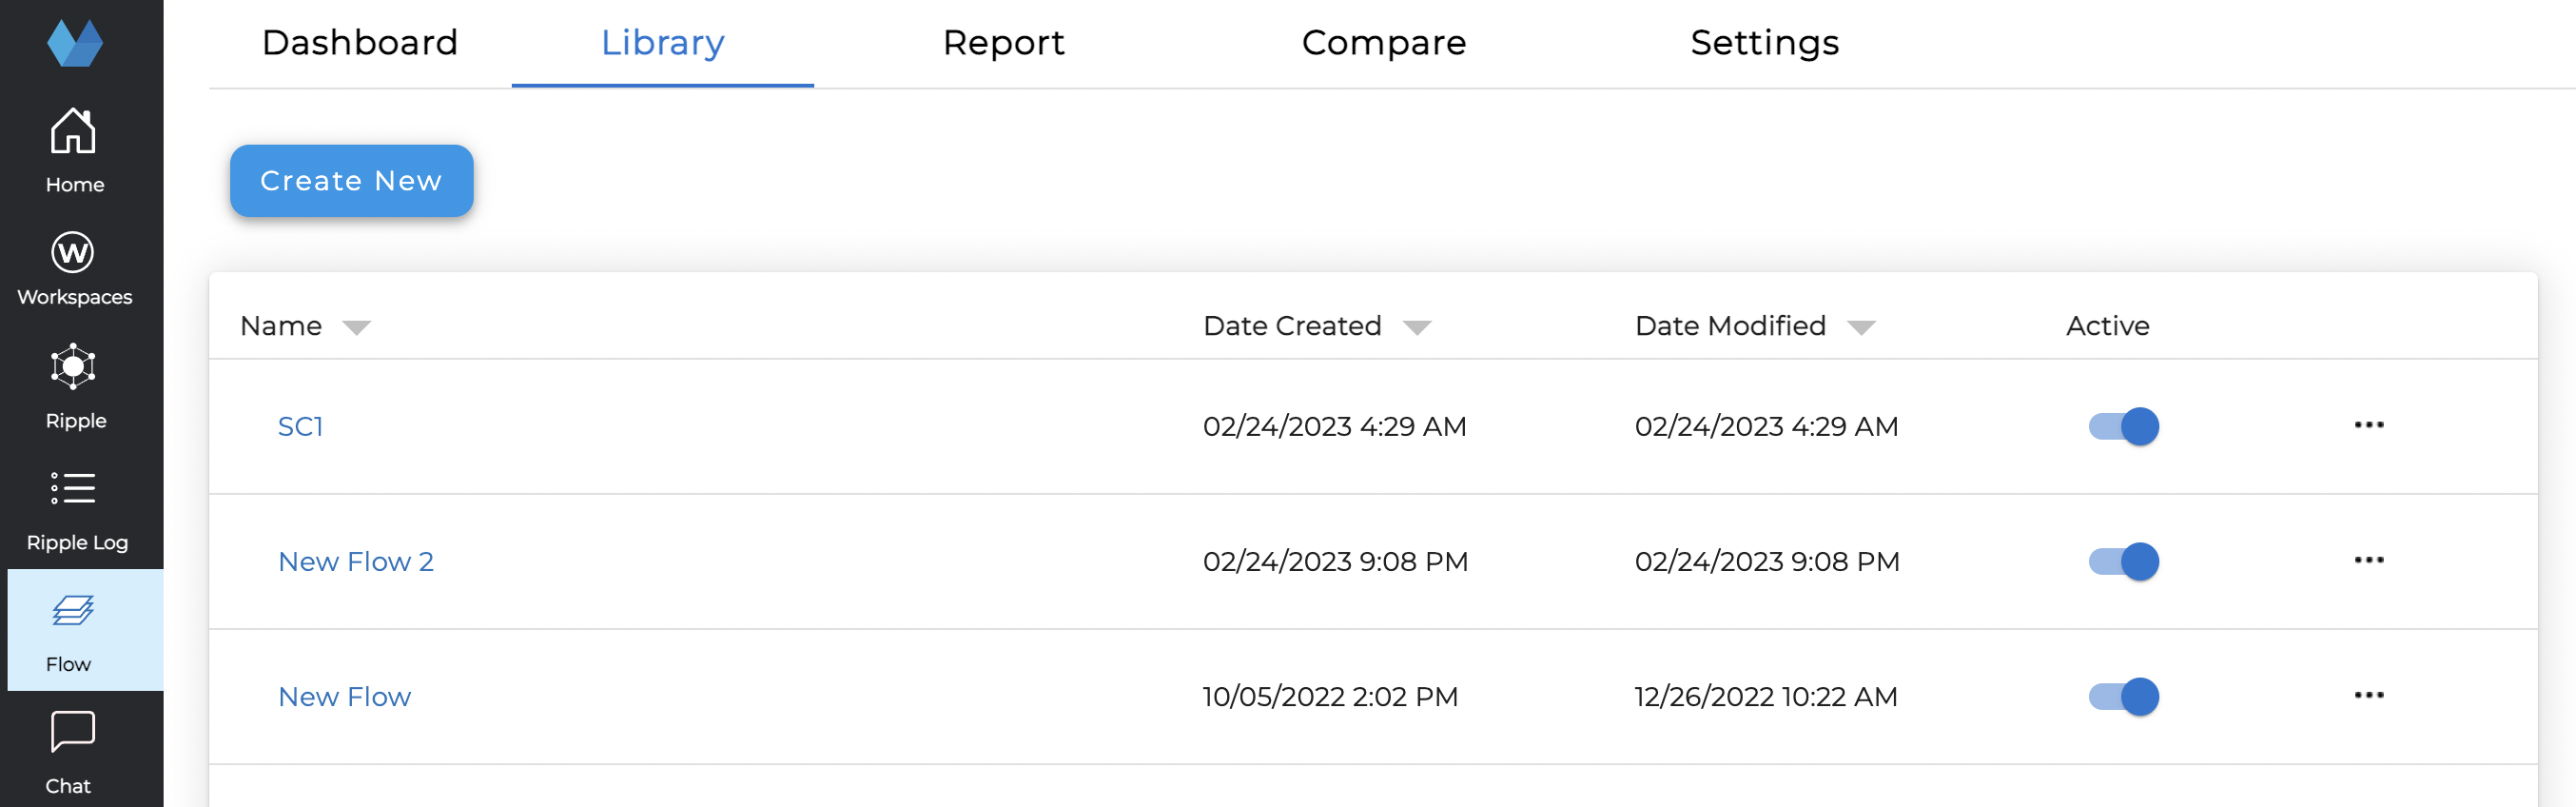
Make sure you are on the “Library” tab (shown below).
To create your first Flow, click on ‘New Generic Document’ icon in the middle of the page (this option is only available for first time users) or the blue ‘Create New’ button at the top right of the page.
Before you begin, we suggest drawing out the steps in your Document Flow on a piece of paper or create a list of the steps to better visualize your process.
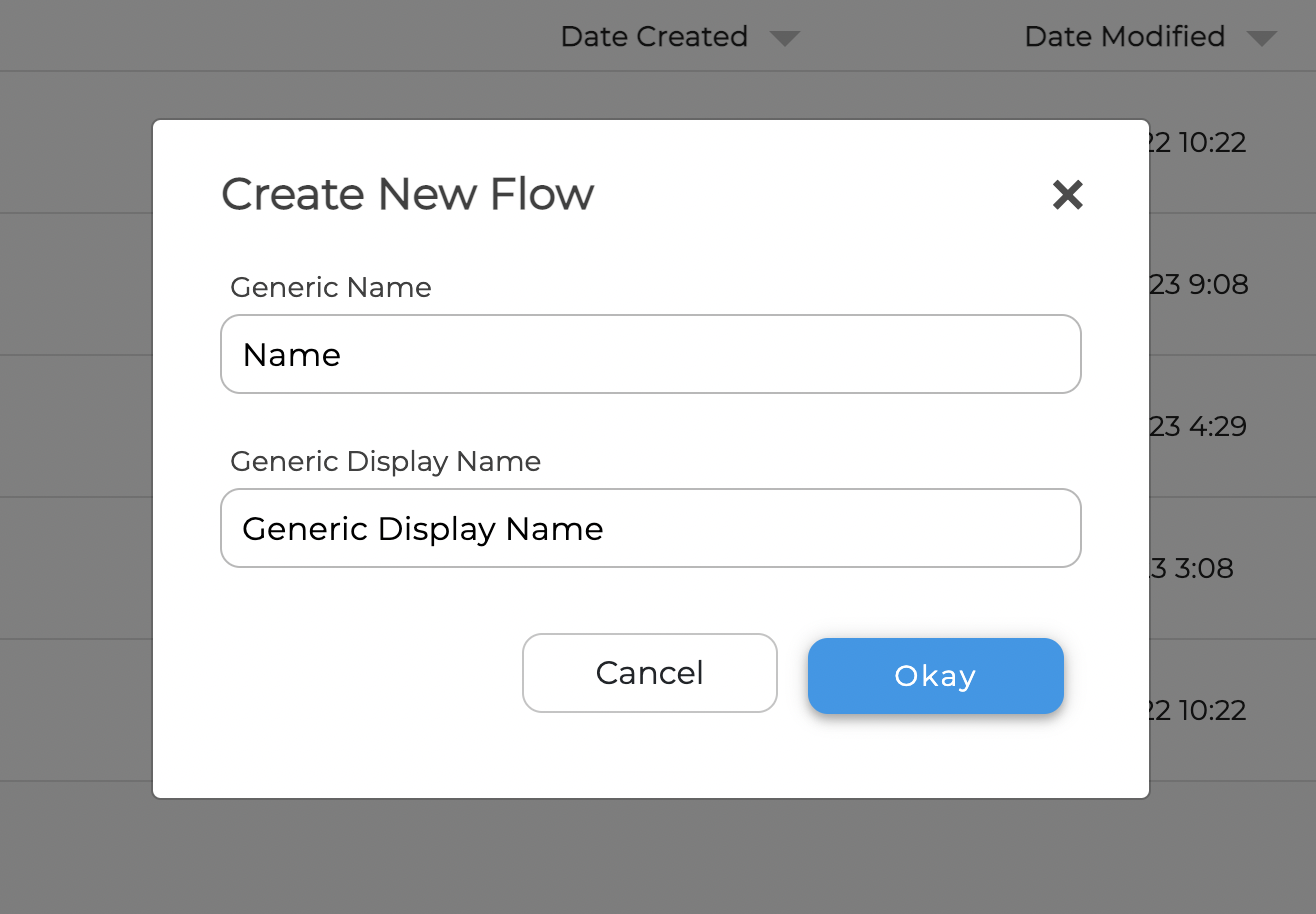
Enter the name of your Flow in the popup modal window shown below and click 'Okay':
Creating a Generic Flow
Click on the name of the Generic Flow that you created. You will be taken to the Generic Flow Builder Page.
A Generic Flow is the ideal expected sequence of document steps in your process.
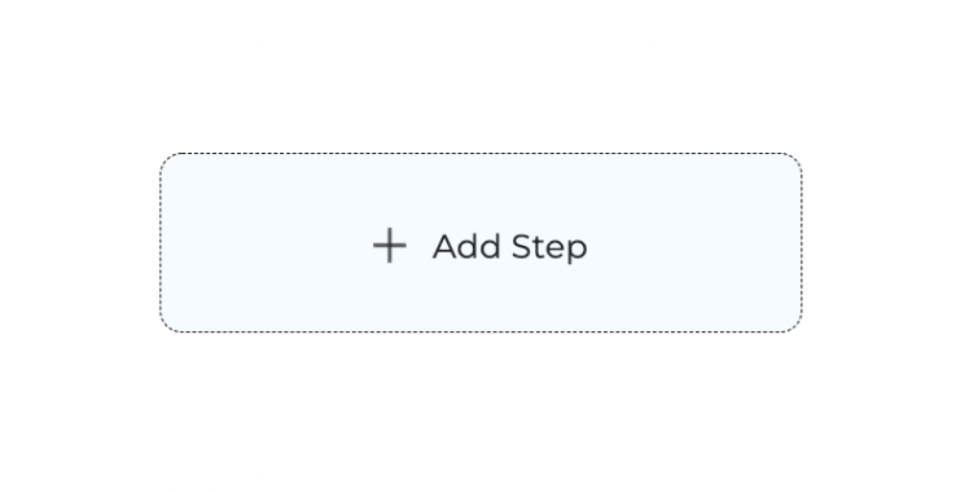
The Generic Flow builder page enables you to build steps of expected incoming documents in your process. To add the first step, click on the ‘Add Step’ box in light blue underneath the Flow name, which will open the popup form shown below.
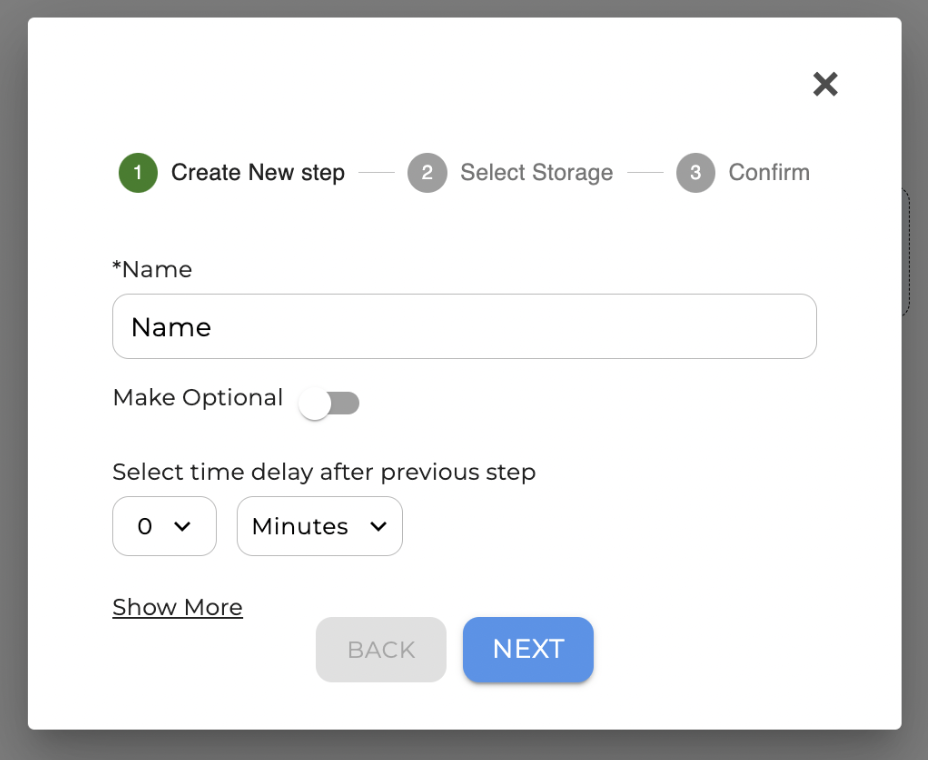
The popup form enables you to define the settings of the step.
First, enter the name of the step and the time delay after the previous step. Note: If this is your first step, you may leave the delay section blank.
The 'show more’ option below provides additional settings. In the ‘From’ and ‘To’ section, you can designate the expected sender and receiver of the document. For example, from ‘Acme’ to ‘Manufacturing, Inc..’ Another advanced option is to indicate Promise Stage of the step.
The next section will ask you to select in which folder you would like the uploaded document to be stored.
Click the blue NEXT button
Select the Workspace, Space and Folder.
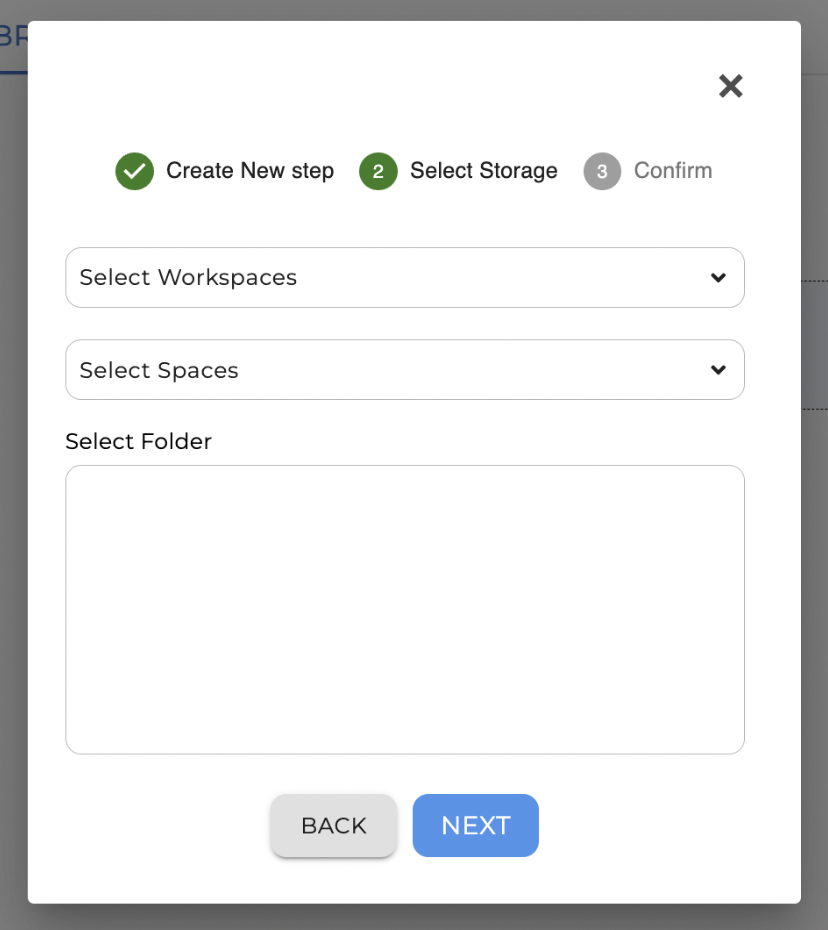
Once you have selected the Folder, click NEXT and confirm the data on the next screen.
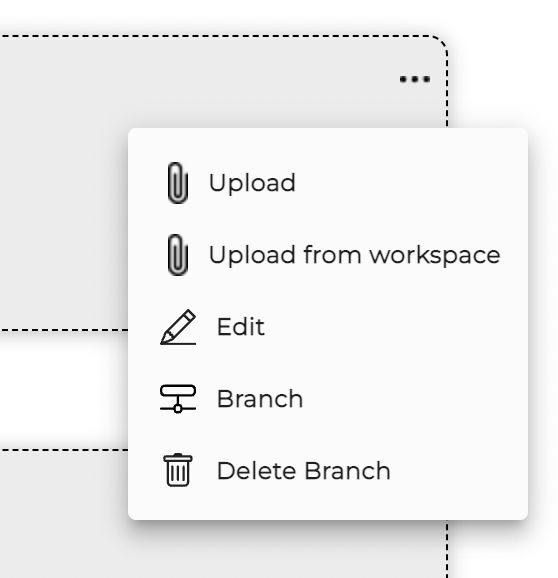
Congratulations! You have now created the first step in the Generic Flow. You can edit the step settings at any time by clicking the 3 dots on the top right of the step.
Create a step for each document in your Generic Flow process.
You can also add a step in between previously created steps by clicking the ‘plus’ icon.

Once you create the entire flow, the next step will be to create Instances.
Creating an Instance
Definition: An Instance is a sequence of documents uploaded into Unity Central that is compared and tracked against the settings outlined in the Generic Flow.
Generic acts like a blueprint of a house whereas the Instance is the house itself.
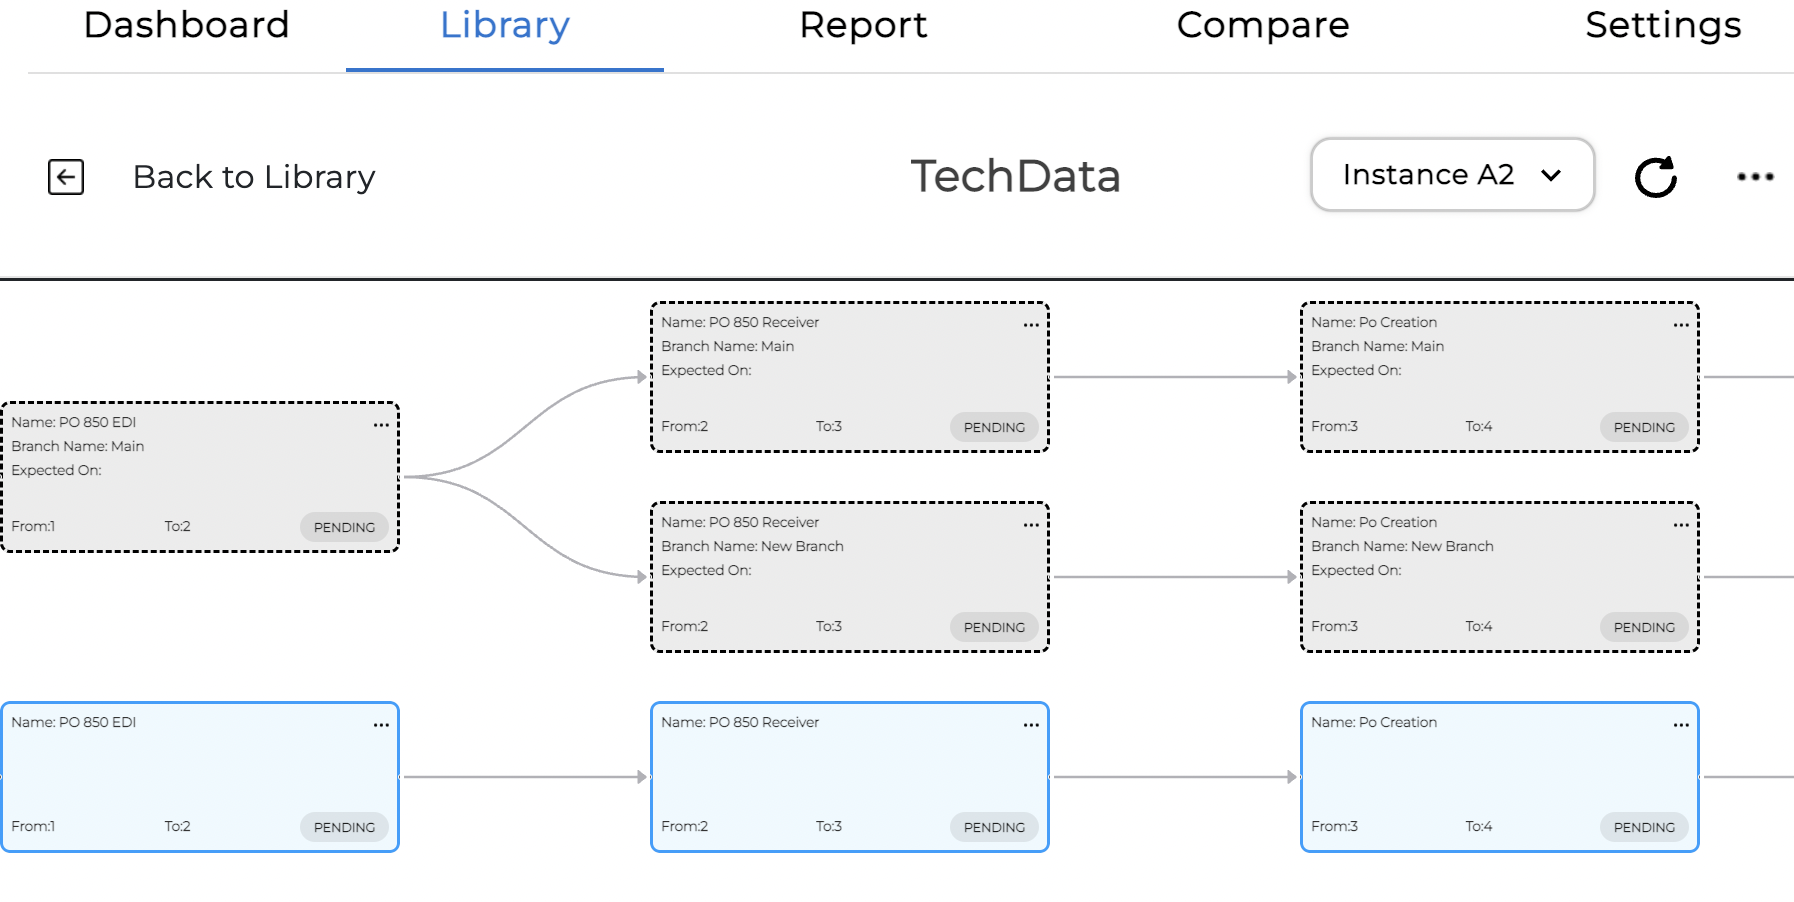
The Instance page is separated into two panels. Displayed on the left is the Generic Flow steps you created earlier in the builder page. On the right is where the Instances will be shown.
Steps:
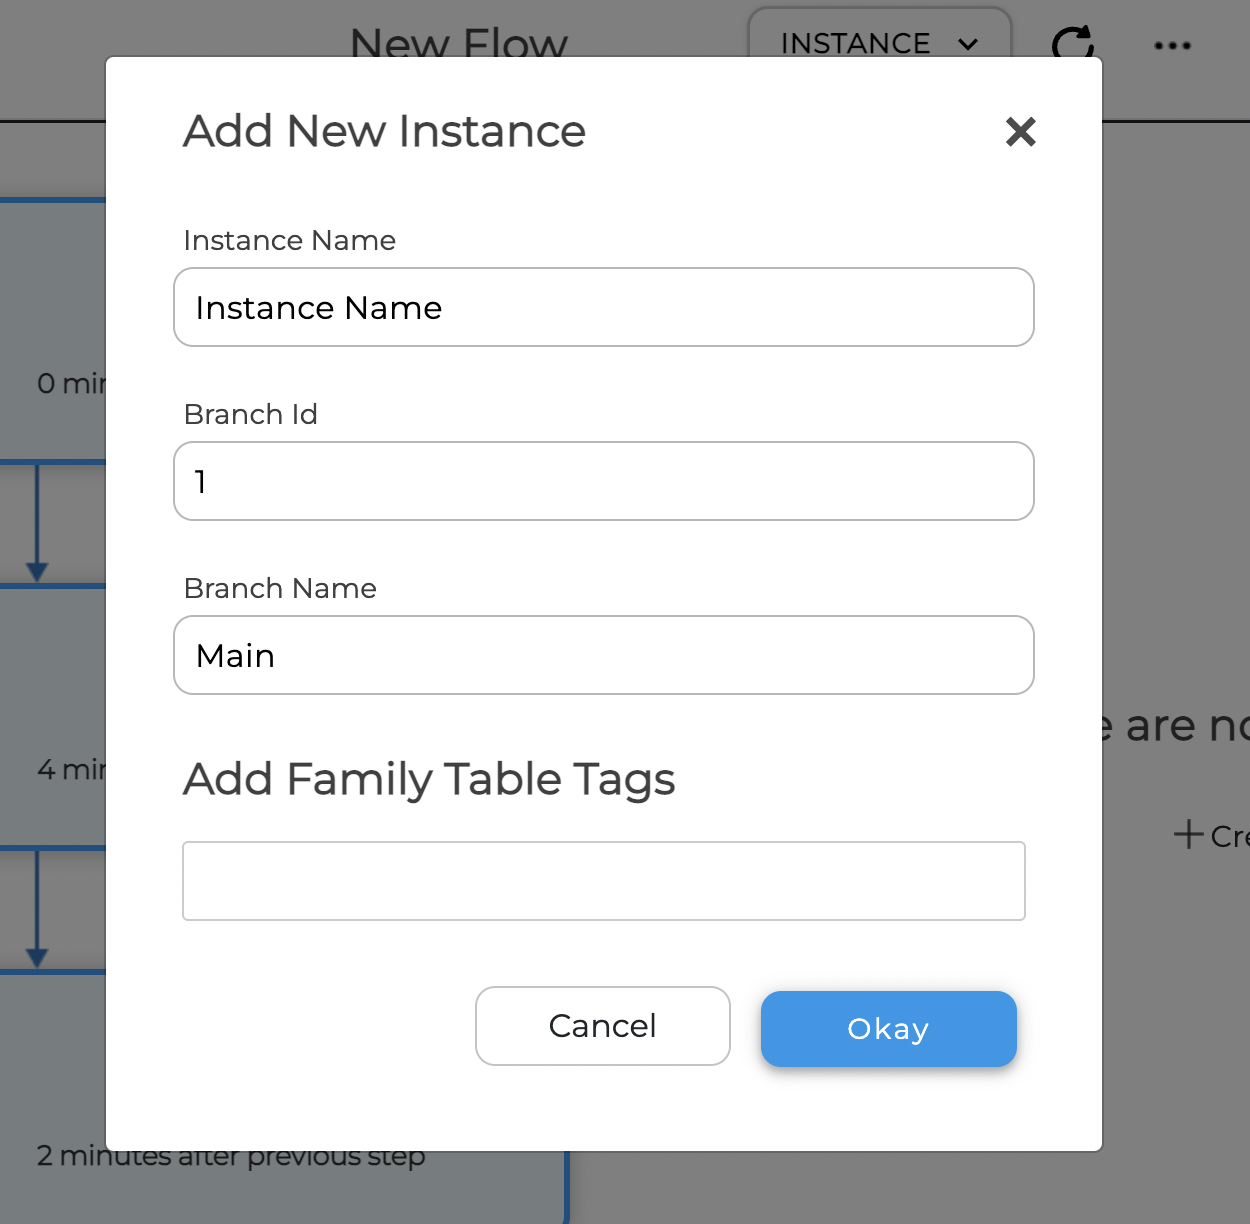
- Select ‘Create New Instance’ at the center of the right panel.

- Enter the name of the Instance, Branch Id, Branch Name, Family Table Tabs, and click OKAY
All the steps are now displayed on the right panel and will automatically match the steps outlined in the Generic Flow on the left panel.
Since no documents have been uploaded to the Instance, every step will show as ‘PENDING’.

To upload a new document to a PENDING step, click the three-dot dropdown on the top right of the Instance step card and click UPLOAD
The three-dot dropdown also displays an EDIT option underneath UPLOAD, which allows you to adjust the time delay after the previous step as well as the ‘From’ and ‘To’ fields.
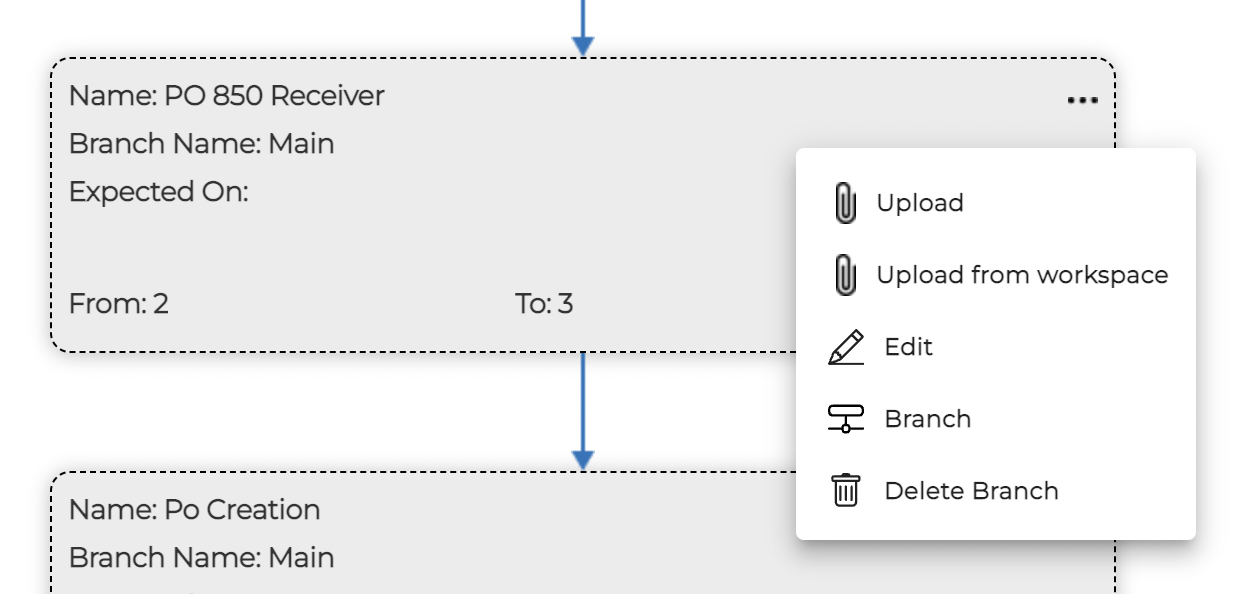
After a document has been uploaded to a step, the step card will display DONE, DELAYED, or SKIPPED depending on how the document matches with the Generic Flow.
- DONE indicates that the document matches the ‘time delay’ after the previous step when compared with the Generic Flow.
- DELAYED indicates a time mismatch between the Instance step and corresponding Generic Flow step.
- SKIPPED indicates that the document in the step is different than the expected sequence outlined in the Generic Flow.
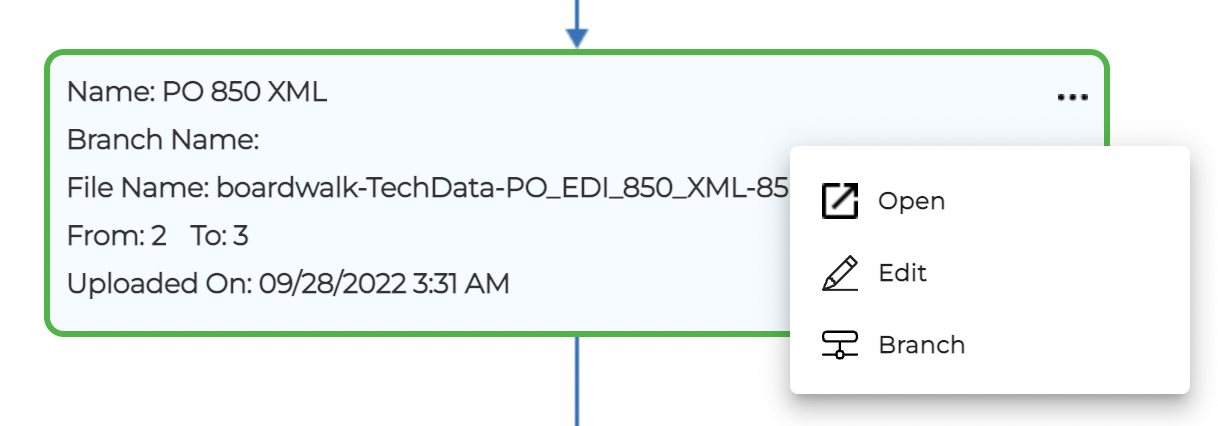
If an Instance step is DONE or DELAYED, the three-dot dropdown will allow you OPEN the document or edit the ‘From’ and ‘To’ fields.
If an Instance step is SKIPPED, you will be able to upload a document and adjust the ‘time delay’ as well as the ‘From’ and ‘To’ fields.
Once the document has passed through the step, it cannot be reuploaded and a step cannot be added in-between steps.
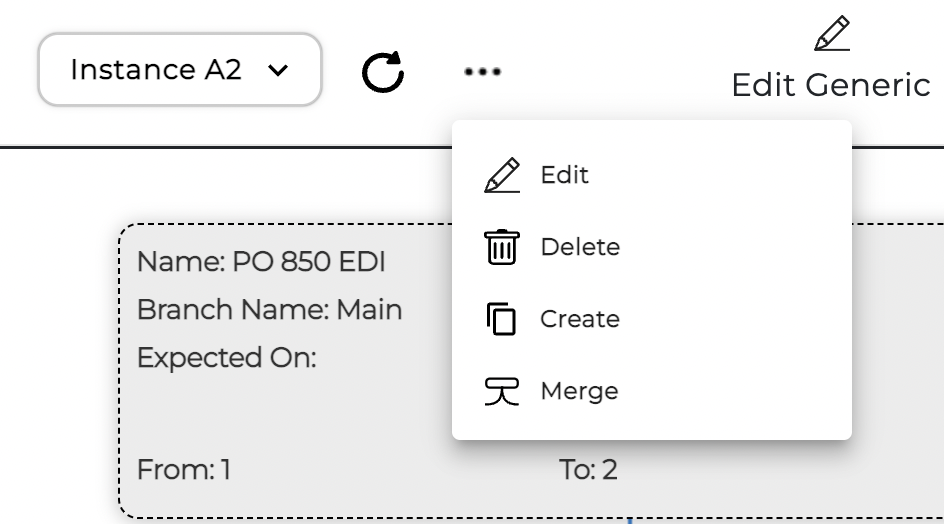
You can create another Instance by selecting ‘Create’ within the three-dot dropdown on the top right of the Instance panel. The same three-dot dropdown also enables you to Edit or Delete the Instance.
To search through or view previously created Instances, select the dropdown menu at the top center of the Instance panel.
If you would like to access and edit the Generic Flow building page, click the ‘edit’ icon at the top right of the Generic Flow panel to the left.
Now that we have created an Instance, we can see an overall view of the analytics in the Flow Dashboard.
Creating an Instance Branch
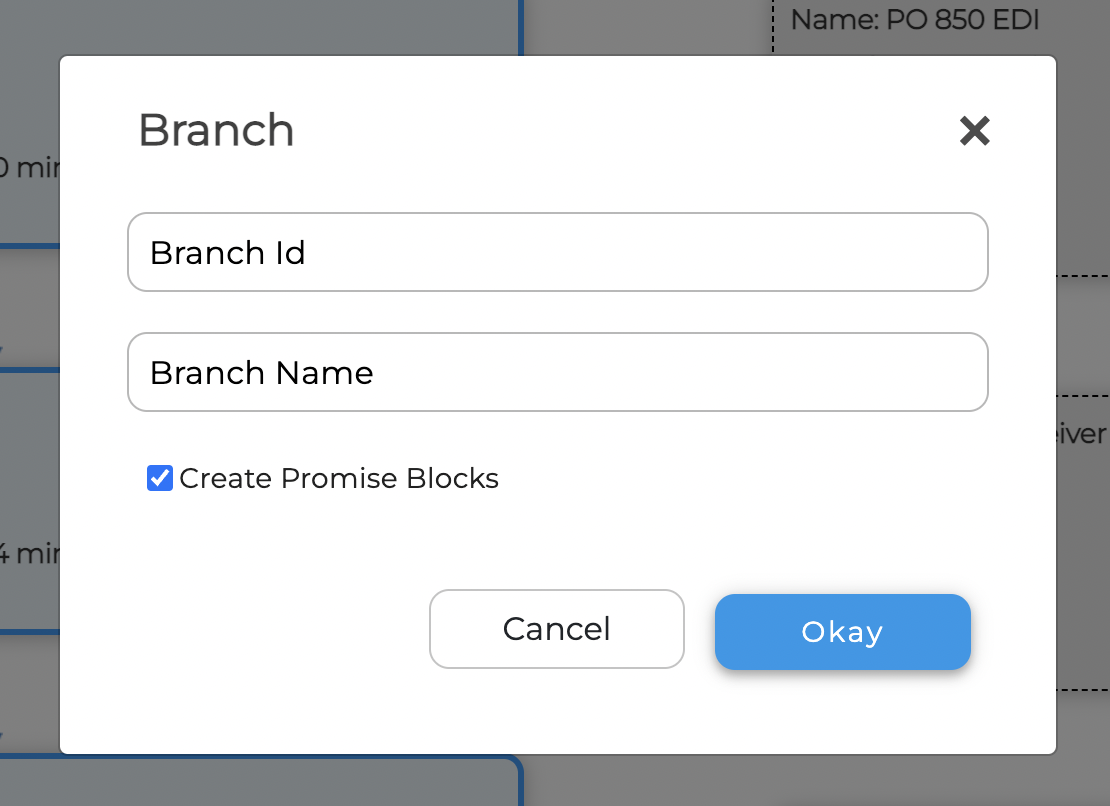
An Instance Branch enables you to split and merge particular instance flow. To initiate a branch, select the three-dot dropdown at the top right corner of the instance step.
You will be asked to provide a Branch ID and Branch Name. The Branch ID can only be numeric.
To view to new branch, select the 'Branches' icon at the top right of the Instance View page:

Branch View page
To delete a branch, select the three-dot dropdown of the corresponding Instance step on the Instance View page:
Exploring the Dashboard
The Flow dashboard displays all the reporting information you need to analyze and track documents going through your Instances. The dashboard will not display any information unless you upload a document to an Instance. If you have not done so already, please create a Generic Flow / Instance Flow and upload a document.
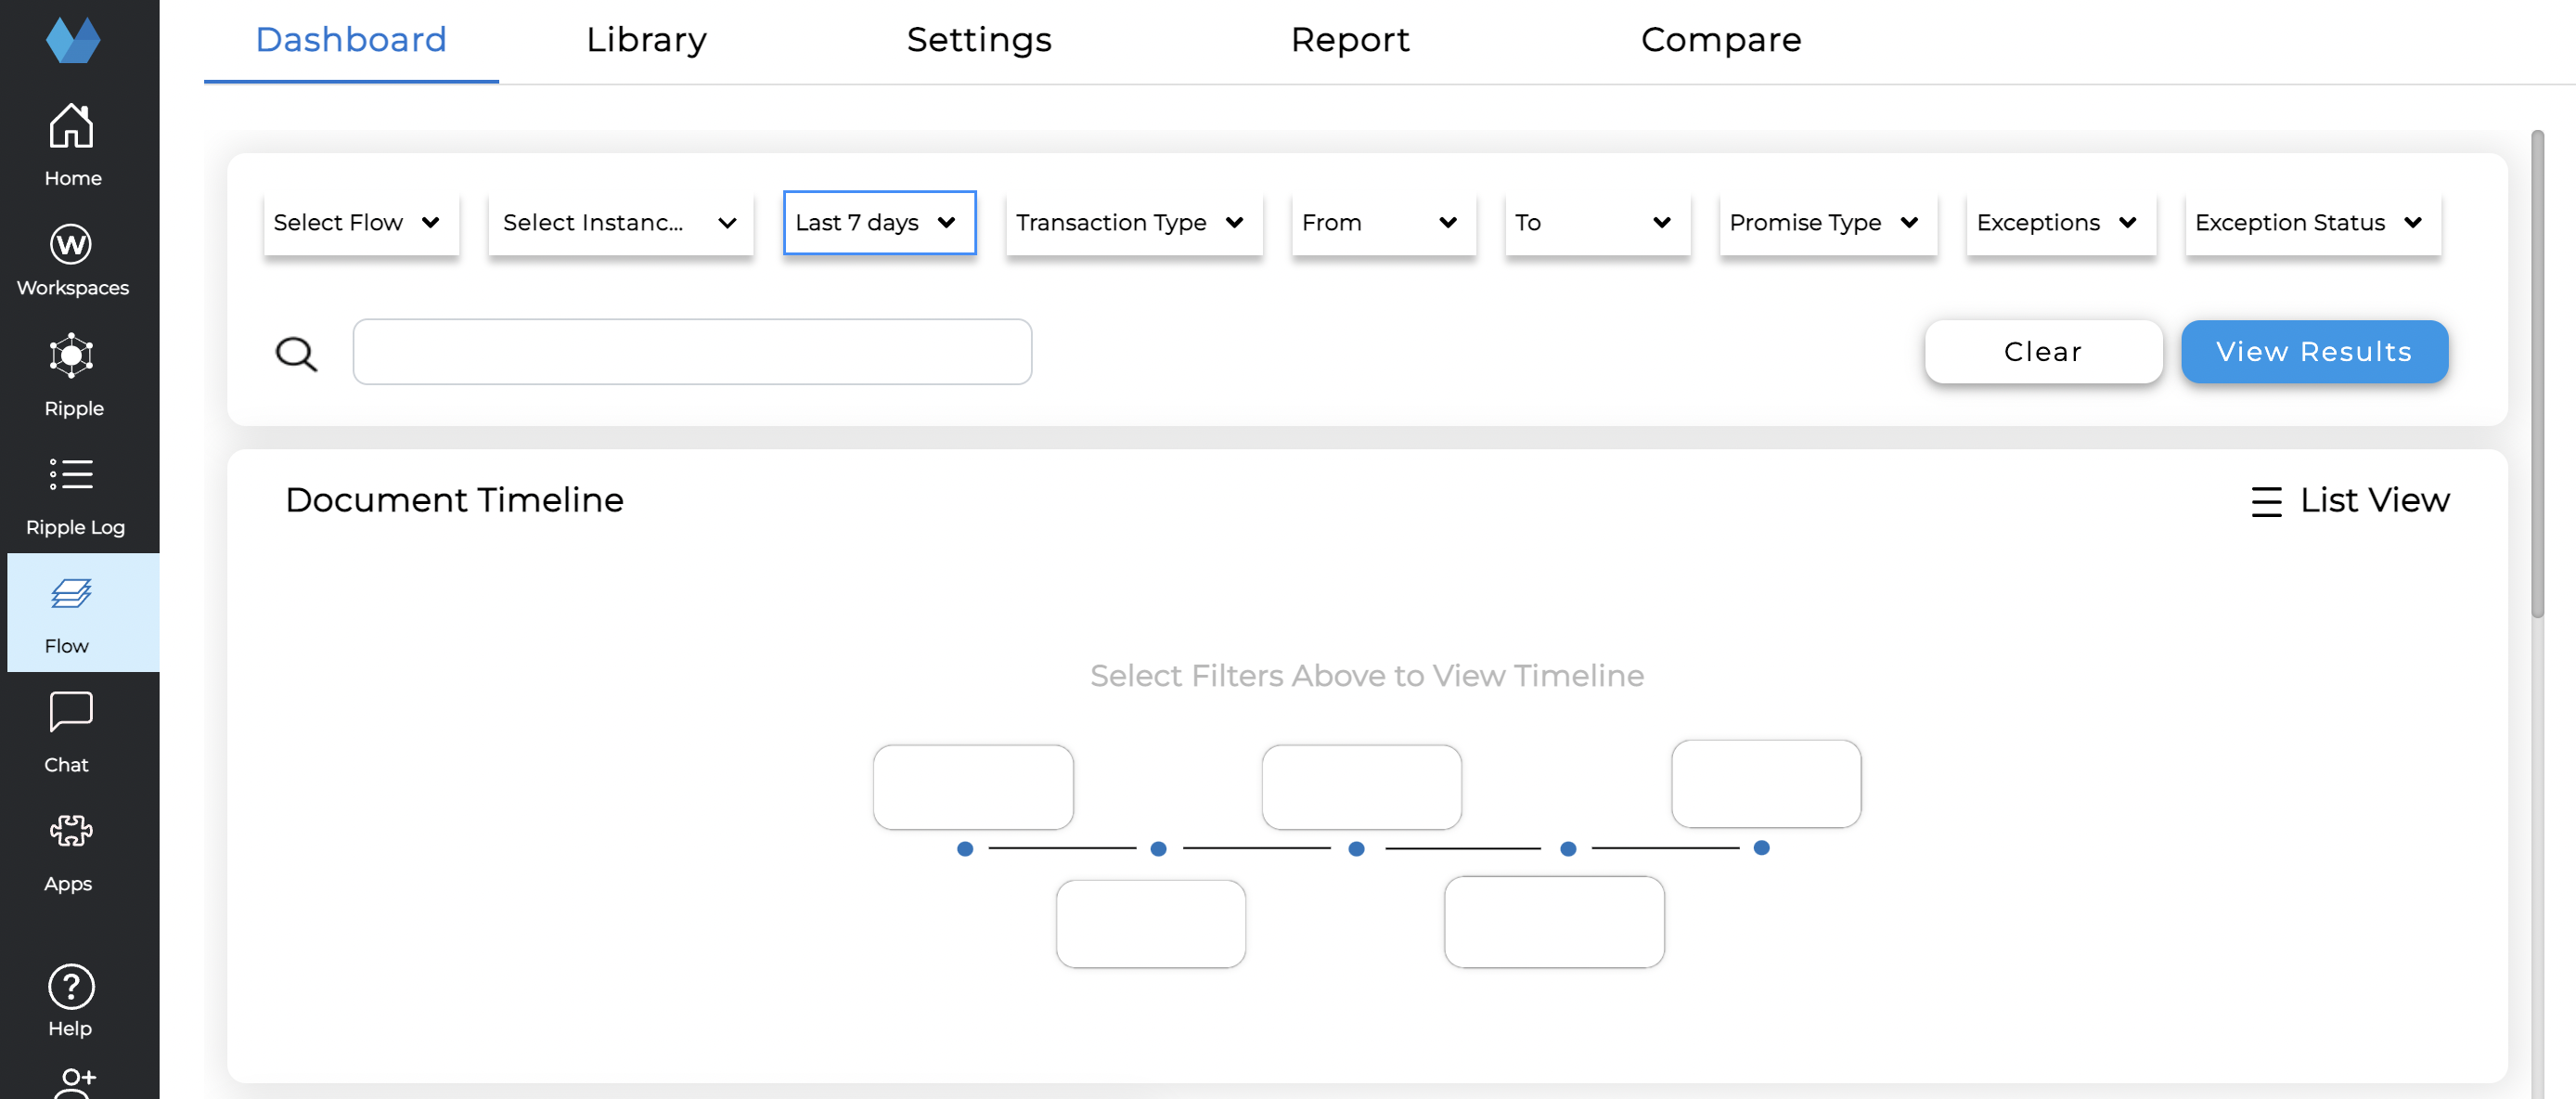
Navigate to the DASHBOARD tab to the left in Flow. Before entering a search, the dashboard will appear blank.
Now let us look at the different sections of the dashboard.
The top section (shown below) enables you to filter and search all Flows.
The search field allows you to find relevant data about a specific keyword (ex. PO35583). Once you enter the keyword, you must select the filter below.
On the next line, click the dropdown menus to select the filters you would like to search against. Once you have selected the filters, click the refresh icon available on right end of the filters.

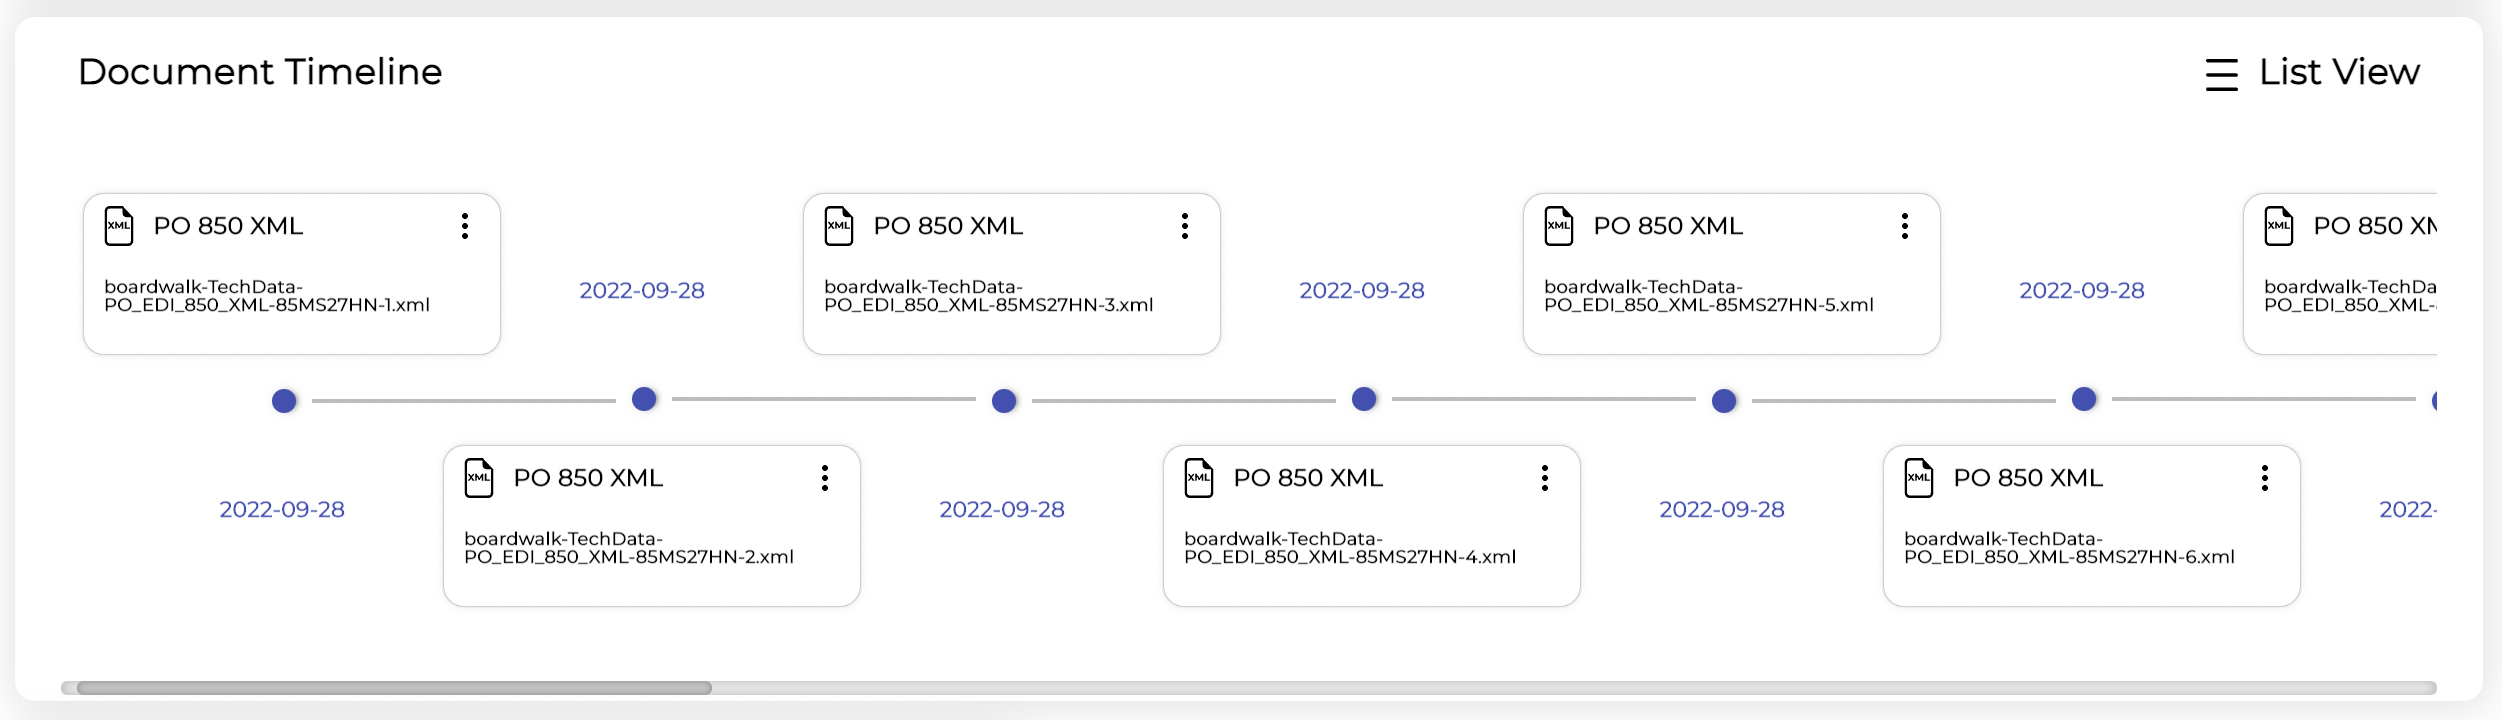
After you click the refresh button, the data visualizations will appear below. The first top section displays the Document Timeline (shown below). The documents are viewed in a time-ordered (left to right) manner showing the most recently uploaded cuments on the right. At the top right of the section, you can switch to the ‘List View’ that displays the documents in a table format.
Timeline View
List View
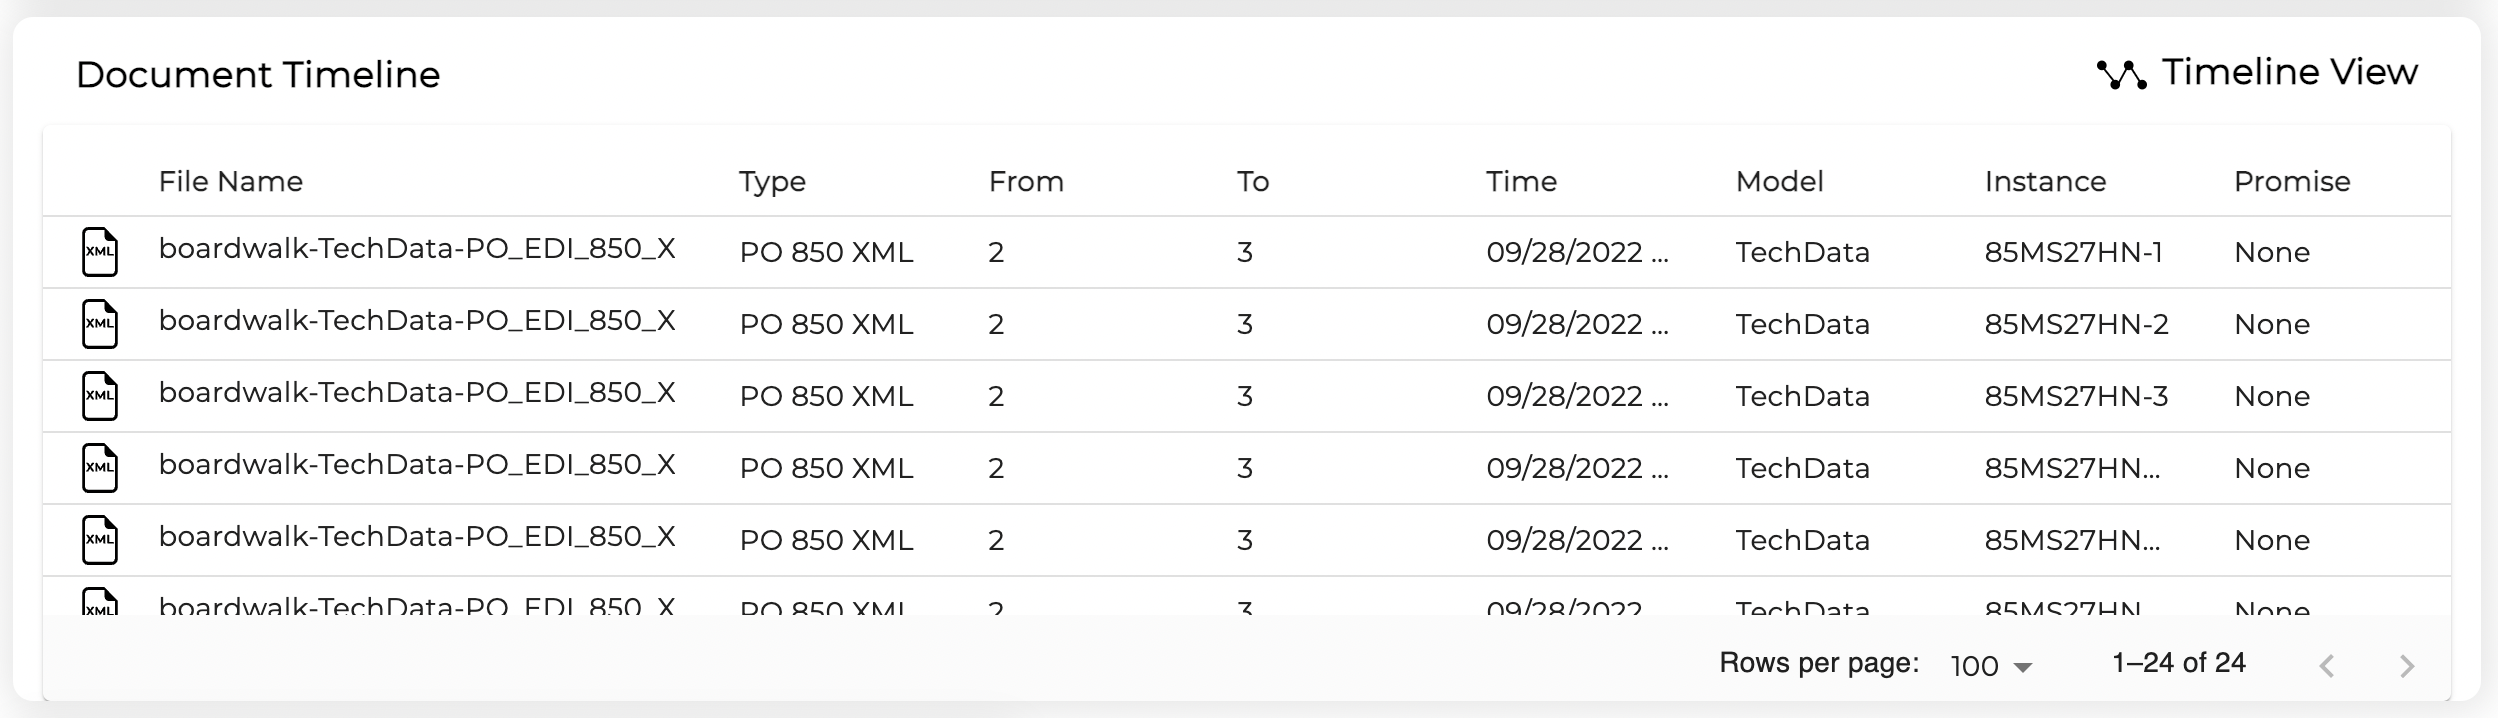
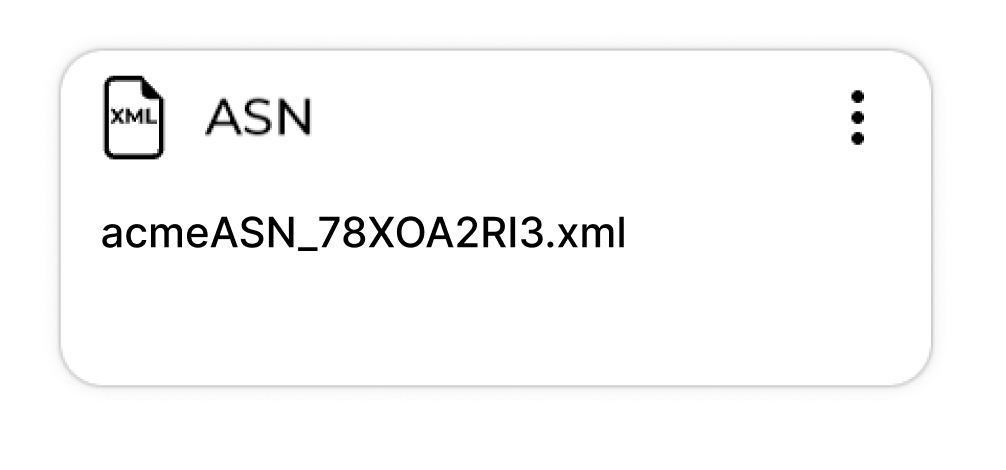
The top left of the document card shows the file type (XML, PDF, etc.) and transaction type. The bottom left shows the name of the document. The top right three-dot dropdown allows you to open the document directly or view the document in the Instance where it originated.
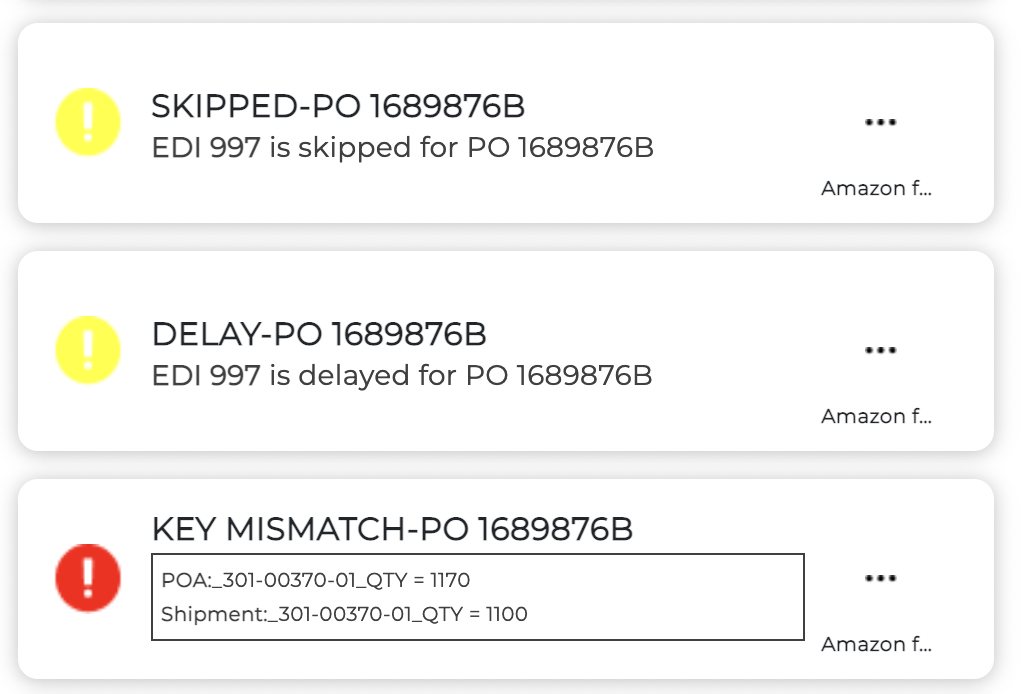
Below the Document Timeline is the Alerts section. An alert is generated when a document is delayed, skipped, missing, or the system finds a mismatch.
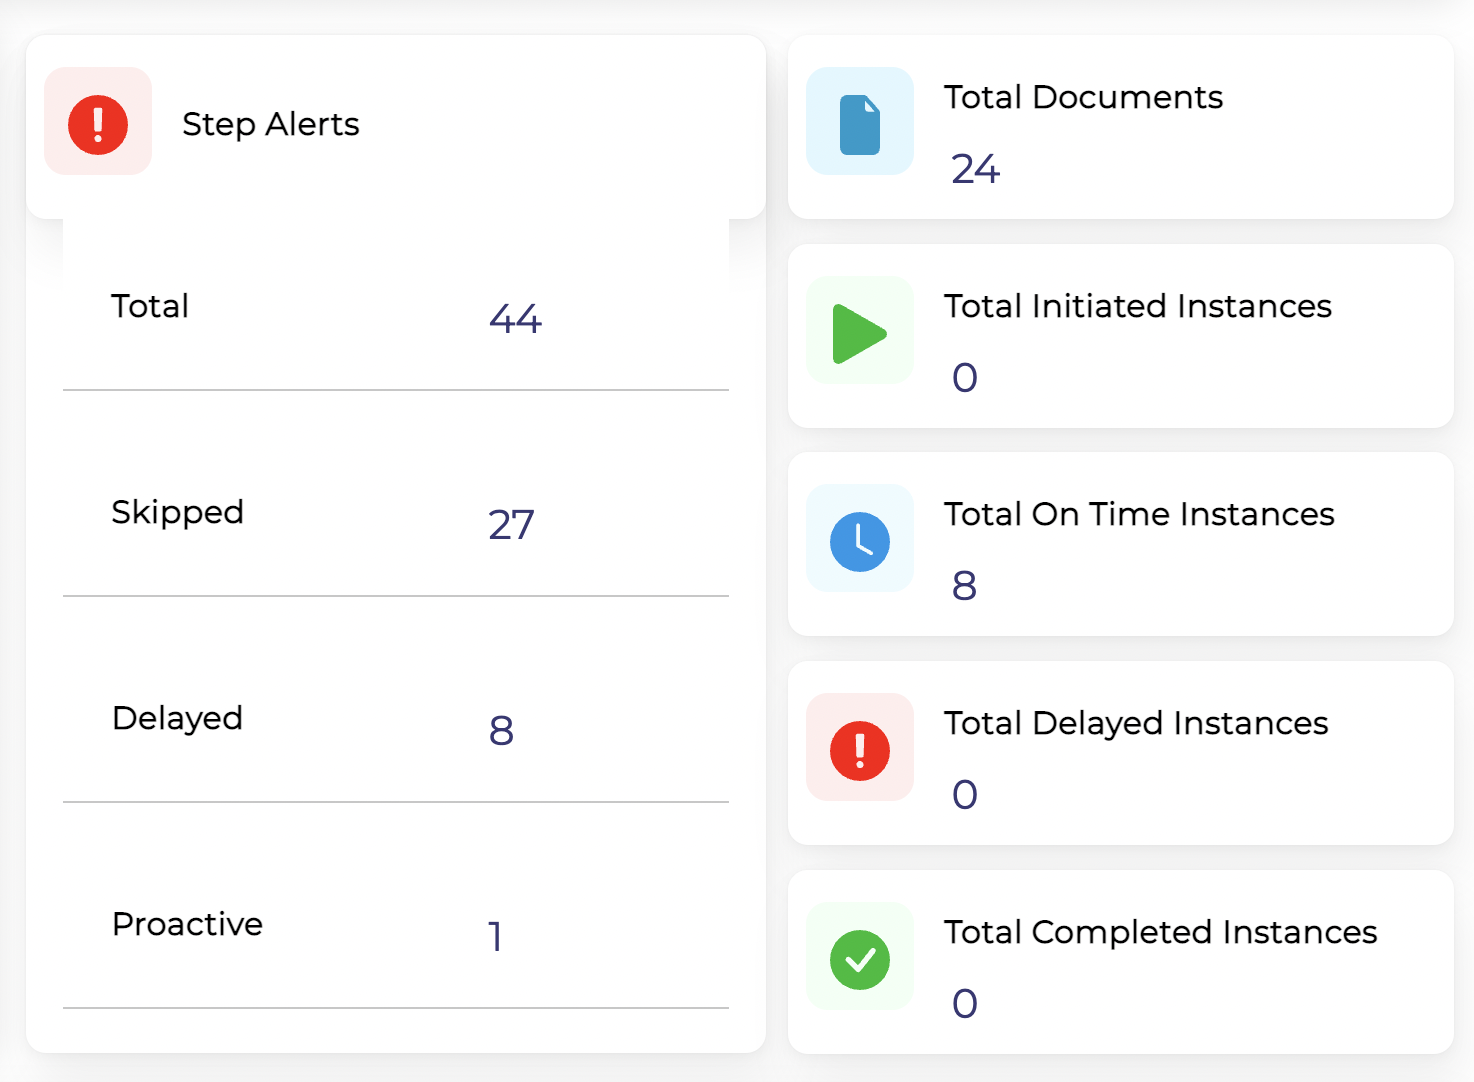
The middle-left section shows high-level information about the documents such total initiated, total completed, total delayed, and total documents. Below total documents is a list of on time and delay frequency of all the transaction types.
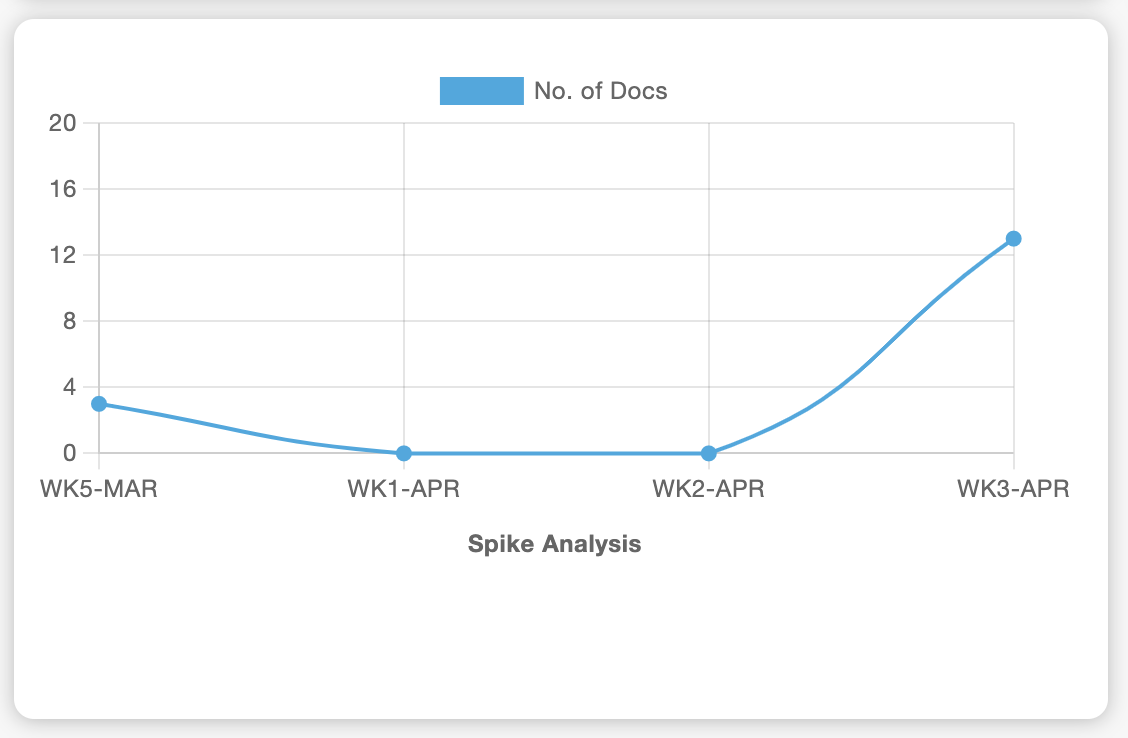
The chart on the bottom-left section of the dashboard shows the Spike Analysis, which enables you to visualize the frequency of documents coming into the system.
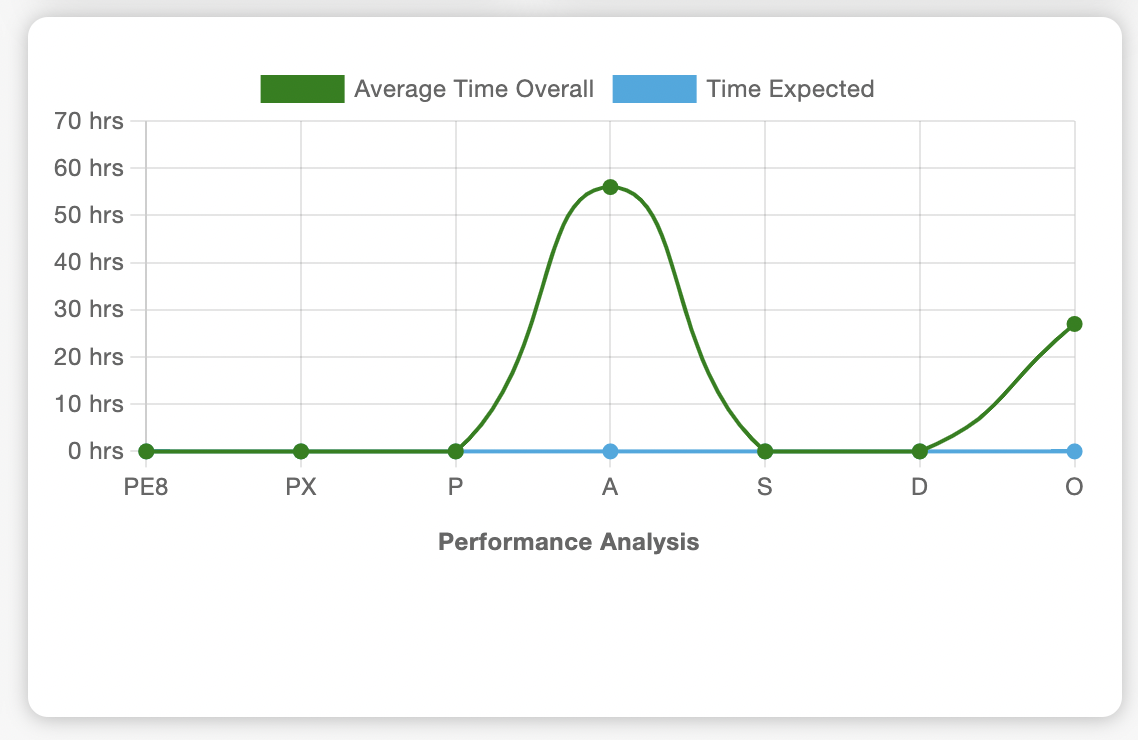
The chart in the bottom-right section shows the average time for documents to be executed versus the time expected as outlined in the Generic Flow, which is useful for understanding overall efficiency of your process